Unlock the Perfect Graham Cracker Crust: Test Kitchen Tips & Tricks
Forget the days of wrestling with delicate pastry dough! If you're seeking a dessert foundation that's both incredibly easy and irresistibly delicious, look no further than the humble yet mighty graham cracker crust. This buttery, toasted base is a true blank canvas, ready to elevate everything from classic cheesecakes and creamy pies to vibrant tarts and bars. While traditional pie dough has its place, a homemade graham cracker crust offers an accessibility and flavor profile that makes it a consistent favorite, especially when time is of the essence or when you're craving that perfect balance of crisp and crumbly texture.
Our test kitchen has crafted countless graham cracker crusts over the years, refining the technique to ensure consistent success for every home baker. We've learned the nuances that transform a simple mixture of crumbs, butter, and sugar into a dessert masterpiece. From the ideal ingredients to the secrets of achieving a perfectly packed and visually appealing crust, we're sharing our expert insights to guide you every step of the way.
Why Homemade Graham Cracker Crust Reigns Supreme
The allure of a homemade graham cracker crust extends far beyond its delicious taste. It's a testament to simplicity and versatility, making it a go-to for seasoned pastry chefs and baking novices alike. Here's why making your own is always the best choice:
- Effortless Simplicity: The technique is incredibly straightforward. With just three core ingredients – graham crackers, butter, and sugar – and a minimal amount of effort, you can create a beautiful crust. There's no delicate rolling, chilling, or intricate transferring involved, freeing up precious time, especially during busy holidays. For those just starting, our Easy 3-Ingredient Graham Cracker Crust: Perfect for New Bakers guide provides a fantastic starting point.
- Superior Flavor & Texture: Store-bought crusts simply can't compare to the rich, toasted flavor and wonderfully crisp, yet crumbly, texture of a fresh homemade version. Commercial options often fall flat, sometimes yielding a blander flavor and a softer, almost moist texture that lacks the satisfying crunch we all crave.
- Ultimate Versatility: This crust is a chameleon in the dessert world. It's a perfect partner for no-bake pies (hello, summer!), cheesecakes, icebox pies, key lime pies, lemon bars, and so much more. Its toasty notes complement a vast array of fillings, from bright and fruity to rich and creamy. It’s particularly ideal during those sweltering summer months when the thought of running an oven for an hour is less than appealing, as many recipes allow you to skip the baking step entirely.
The Essential Trio: Ingredients for Your Perfect Graham Cracker Crust
Creating a stellar graham cracker crust starts with understanding the role each of its core ingredients plays. While the recipe is simple, selecting the right components makes a significant difference in the final product's flavor, texture, and structure.
- Graham Crackers (or Cookie of Choice):
- Quantity is Key: You'll generally need about 12 full graham cracker sheets, which yields approximately 1 ½ cups of finely ground crumbs. Precision here ensures the correct crust consistency.
- The Traditional Choice: For that classic, toasted flavor and ideal crispy texture, honey graham crackers are our top recommendation. Their distinct taste lends itself beautifully to a successful crust.
- Brand Matters: In our tests, we've noticed a difference between name-brand and store-brand crackers. Store brands can sometimes be blonder in color and less firm, resulting in a crust with less robust flavor and a softer, almost moist texture. While you *can* use any brand, choosing a quality name-brand cracker often yields superior results.
- Embrace Variety: This recipe is incredibly adaptable! Craving a chocolatey base for your icebox pie? Easily swap in chocolate graham crackers. Want a hint of spice for a s'mores pie or apple crumble cheesecake? Cinnamon graham crackers are your friend. You can even experiment with other dry, crisp cookies like vanilla wafers, gingersnaps, or even digestive biscuits if graham crackers aren't available, always aiming for that 1 ½ cups of finely processed crumbs.
- Unsalted Butter:
- Control Your Flavor: Unsalted butter is always our preferred choice in baking. It gives you complete control over the salt content of your dish, allowing you to fine-tune the flavor balance.
- The Mighty Binder: Melted butter is crucial. It acts as the primary binding agent, coating the graham cracker crumbs and allowing them to stick together when pressed. Without it, your crust would simply be a pile of loose crumbs.
- Richness & Depth: Beyond its binding properties, butter infuses the crust with a luscious richness and depth of flavor that's simply irreplaceable.
- Granulated Sugar:
- Sweetness and Structure: Granulated sugar adds the necessary sweetness to balance the crackers and complements the butter beautifully. More importantly, it plays an assisting role in holding the crumb together, working in tandem with the melted butter to create a sturdy, yet tender crust.
- Flavor Variations: While granulated sugar is standard, don't hesitate to experiment. For a richer, more complex flavor with hints of molasses, you could split the measurement with brown sugar. Just remember, don't skip the sugar entirely, as it's vital for both taste and structure.
Test Kitchen Secrets: Mastering the Press for a Flawless Graham Cracker Crust
Once you have your perfectly combined mixture, the magic happens in the pressing. Our test kitchen pros have perfected the art of shaping, offering invaluable tips to ensure your graham cracker crust is strong, beautiful, and holds together perfectly every time.
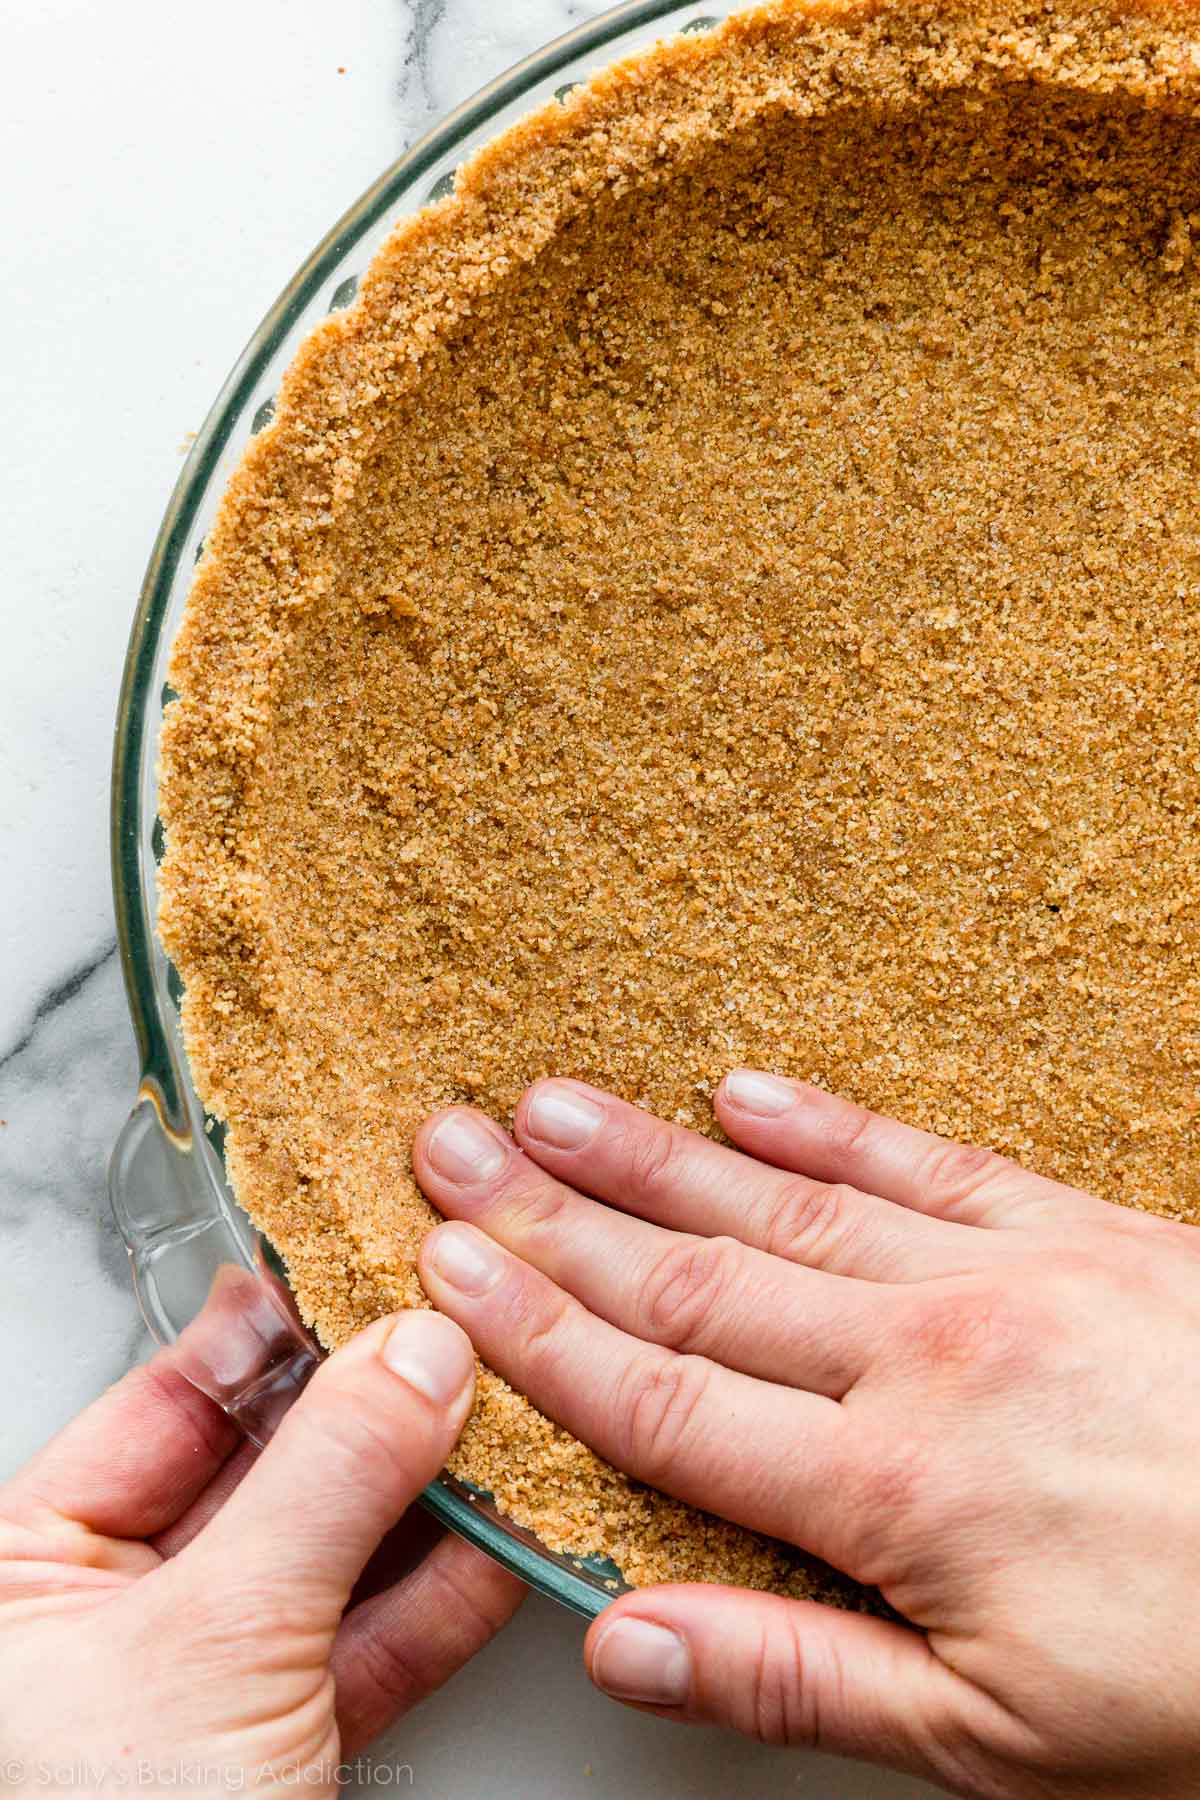
- "Crumbly" is Your Friend (Initially): When you first start pressing the mixture into your pie plate, it will feel crumbly and sandy. This is perfectly normal! Don't be discouraged. With a bit of gentle but firm work, the butter will cool slightly and start to bind the crumbs together, transforming that loose mixture into a cohesive crust.
- The Art of Pressure: There's a delicate balance when pressing the crust. You want to tightly pack the crumbs without compacting them so much that they become rock-hard or crack. Aim for firm, even pressure. Press just until the crust stops moving under your hand or tool, then shift to the next section. Over-pressing can lead to a dense, tough crust that's difficult to slice.
- Tools for Evenness: While your fingers are excellent for initial spreading, the flat bottom of a dry measuring cup or a glass is your best friend for achieving a smooth, even base and sides. Use a circular motion for the bottom and press against the sides with the curved edge of the cup or glass.
- Round the Bottom for Strength and Beauty: Instead of creating a sharp, 90-degree angle where the sides meet the bottom of the pie plate, build up an extra bit of crust to create a gentle curve or "round" in this area. This seemingly small detail dramatically strengthens what is often a weak point in the crust, preventing crumbling when sliced. Plus, it gives your finished pie a more polished, professional appearance.
- To Bake or Not to Bake:
- Bake for Toastiness & Structure: For most recipes, especially those with wet fillings or when you desire a distinctly toasty flavor and extra crispness, a quick pre-bake is recommended. Typically, 10-12 minutes at 350°F (175°C) is sufficient to set the crust and deepen its flavor. Allow it to cool completely before adding your filling.
- Skip Baking for No-Bake Desserts: If your recipe is truly no-bake and features a firm, set filling (like many cheesecakes or icebox pies), you can often skip the baking step entirely. Chilling the crust thoroughly in the refrigerator for at least 30-60 minutes will allow the butter to firm up and bind the crumbs effectively.
Ready to ditch the flimsy store-bought options for good? Our guide on Homemade Graham Cracker Crust: Elevate Any Dessert (Skip Store-Bought!) dives deeper into making this switch permanent.
Beyond the Basics: Customizing Your Graham Cracker Crust for Any Dessert
One of the true joys of mastering the graham cracker crust is its incredible adaptability. It's not just a foundation; it's an opportunity to infuse extra flavor and texture into your desserts.
- Spice It Up: Don't be afraid to add a pinch of cinnamon, nutmeg, or even ginger to your graham cracker crumbs, especially if you're pairing it with fillings like pumpkin, apple, or even a spiced chocolate mousse. A tiny pinch of salt can also do wonders to balance the sweetness and enhance overall flavor.
- Citrus Zest: For lemon or key lime pies, incorporating a teaspoon of finely grated lemon or lime zest into the crumb mixture before adding the butter can add a bright, aromatic burst that perfectly complements the filling.
- Nutty Notes: If you love nuts, consider adding a couple of tablespoons of finely ground pecans, walnuts, or almonds to your graham cracker crumbs. This adds another layer of flavor and a slightly richer texture.
- Dessert Pairings Galore: The possibilities are truly endless. Think classic New York-style cheesecake, tangy lemon meringue pie, creamy banoffee pie, refreshing cranberry curd tarts, rich chocolate cream pies, or even individual dessert cups for a layered parfait. Each can be wonderfully enhanced by a perfectly crafted graham cracker crust. For a thicker, more substantial crust, simply increase the cracker crumbs and butter proportionally, ensuring you maintain the right crumb-to-butter ratio for optimal binding.
The journey to the perfect graham cracker crust is one of delightful simplicity and rewarding results. By following these test kitchen tips and embracing the versatility of this beloved base, you're not just making a crust; you're setting the stage for truly unforgettable desserts. So, gather your ingredients, unleash your inner baker, and prepare to elevate your sweet creations to a whole new level. Your taste buds (and your guests) will thank you!
